Sunday, August 29, 2010

Upside-down rainbow!

My husband was out barbecuing hamburgers for dinner.  He came in the house and said there he could see  a rainbow if he stood by the loquat tree and looked straight up. I thought maybe he had to many too gold fish crackers or something (couldn't blame it on beer as he hasn't had one today! lol) because it hasn't rained at all here.

 Being one who LOVES rainbow I went out to look anyway, just in case. (And smartly grabbed my camera!)  I stood by the loquat tree as directed and scanned the sky.  At first I didn't see it  as I was "just" looking over roof lines and tree lines.  When he said "look straight up" he really meant straight up! When I finally looked straight up this is what I saw - an upside rainbow!

No, I have not altered the photos, this is the "rainbow" as I saw it..I didn't have any landmarks (like trees or buildings) so I had my son stand in the frame to get a little perspective.  The battery on my camera was dying so I only got the 4 shots.  By the time my son ran in the house,  grabbed his camera and got back outside it was gone.

I searched the Internet for "upside down rainbow"  and found that technically it is called a "circumzenithal arc". It happens by sunlight refracting through a thin layer of ice crystals high in the atmosphere.  You can click the link to read more about the "smile in the sky!

Have a fabulous week!

A series for another challenge

It's been awhile since I have participated in a challenge over at Collage Obession . As soon as I saw the image, an idea popped in my head! And since I am in ATC mode, I decided to make an ATC (SURPRISE!). When all was said and done I actually created  a series of 4 ATCs using the image!
The "What's New Pussy Cat" & "Nice Kitty" images were cropped using my camera's software and then inserted into MS Word.  I added a text box and used "white" text.  A couple of thing you can't tell in the photo, is the Nice Kitty's face is actually cut & popped and the leaves around him are embossed in "tinsel green" (glittery).  The leaves in the "What's New. . ." ATC were embossed, cut and glued on top of the image!  The crown is from Tim Holtz' "Distressables Elements" (Digital images).   The other 2 ATCs were pretty simple - printed, matted, add the "buttons" and bling.

Thanks for stopping by!  Hope you have a fabulous week!

Linda

Friday, August 27, 2010

Gingersnap Challenge #65 Famous Painter or Painting

Gingersnap Challenge #65 Famous Painter or Painting closes on Sunday.  I couldn't come up with anything.  I had a few ideas, but they involved looking for some postcards from an art class I took a year or so ago.  The thought of trying to find anything in any of the places they might possibly be staying safe is daunting.   So I was going to let this one go.

In May I was in an antique store and they had bags of used postage stamps for a dollar.  I grabbed a couple of bags.  One bag has stayed in my sight since I purchased it, the other one disappeared.  Tonight the 2nd bag just materialized (things do that here).  It was stuffed full, I found some stamps that fit perfect in the Gingersnap challenge.  So I made a quick, simple ATC!


The artist are Mary Cassatt, John Trumbull and Thomas Easkins.  Art history is definitely not one of my strong suits, so I did a little research.   Each name is linked to an article on Wikipedia.

I guess the art classes I've taken have left a small impression on my brain!  I didn't remember Mary's name, but I recognized one of her paintings, "The Boating Party"!!!  I am totally impressed! lol I thought I recognized John Trumbull's name before I looked up his art work, after I looked him up I didn't recognize any of the paintings.  I didn't recognize either Thomas Easkins' name or paintings.  Like I said, art history is NOT my strong suit.

Hope you have a fabulous weekend!

Linda

Wednesday, August 25, 2010

CCC Week 11

Week 11 lesson in A Compendium of Curiosities Challenge over at Studio L3 is "Blended Batik", which can be found on page 36.  Hop on over and take a look at all awesome ART others have been creating.

I created 2 ATCs  using the technique.   The image on the first ATC is from AlteredPages.com "mini images".

This is the 2nd version of the 2nd ATC.   On the original version (that will never be seen),  I stamped the sentiment directly onto the ATC.  It was hard to read as it was so faint.  So in addition to the technique for the week's lesson, I stamped the sentiment on tissue paper, then applied it with Claudine Hellmuth's Studio Multi Medium.   As you can see, the tissue paper all but disappeared, but the sentiment stayed "on top".  

Hope the rest of your week is fabulous!

Linda

Saturday, August 21, 2010

CCC Week 10

The weeks are flying by and we are already finishing up week 10 of the Compendium of Curiosity Challenge over at Studio L3!  If you haven't already dropped by, you don't know what you are missing!

This week we were instructed to turn to page 46 for the Distress Stickles technique.  Part of the instructions this week were to name the colors of Distress Stickles we use.  I created 3 ATCs, on each one the base the stickles were applied to is different.

The image on the "Live" ATC is a sticker (you remember those, don't you?)  I used Walnut Stain, Frayed Burlap (I think) and Scattered Straw Distress Stickles on the center of the sunflower.

On the "haunted house" ATC I used Vintage Photo, Antique Linen and Peeled Paint Distress Stickles on the cardstock tree.  (The eyes and mouth of the Jack O'Lantern  came that way and are not Distress Stickles to my knowledge.)

On the "Autumn" ATC I used  Fire Brick, Spiced Marmalade, Scattered Straw, Peeled Paint and a bit of Walnut Stain Distress Stickles on the grungepaper leaf.  (This ATC looks WAY better in person than it does in this photo.)

I am up to about 55 ATCs for the cruise!  Still have a bunch to go!  For those of you who asked, YES!  It IS the Tim Holtz Cruise to Canada and New England!  I am SUPER excited. 

Hope your weekend is exactly what you want it to be!

Linda

Friday, August 20, 2010

Another ATC, another challenge

I have been working on ATCs for the cruise for awhile and try to work them into challenges as much as I can.  Today I created a couple of ATCs for the Gingersnap Color Challenge #64  -Yellow, Orange, & Red.  I could not decide which one I liked better so I am posting both, since they both fit!  Be sure to check out the link and see all the other creations for this challenge!

This first one I used a piece of "recycled" tea box, covered with gesso, then added yellow, red and orange oil pastels, covered that with a thin coating of multi-medium.


For the 2nd ATC, I used Alcohol Inks-including copper (it looks brown in the picture). The stamp is one of Tim's.

Have a fabulous weekend!
Linda

Tuesday, August 17, 2010

I am honored!

This morning I noticed there was a new comment on my grandkids post, so I jumped on to see the comment.  I was very pleasantly surprised when Terry congratulated me on being selected as a GingerGem over at Gingersnap Creations for my "Sunshine" challenge ATC (GC#63)!  You can view the other AWESOME GingerGem's creations here!  


Doing the happy dance,
Linda

Sunday, August 15, 2010

My first Grandbabies picture! And 1 ATC - 2 challenges

As I mentioned in my last post I was waiting for my daughter, Kristine, and her fiance, Randy.  They FINALLY made it  here about 2:00 p.m. Friday afternoon!  We had a fabulous, but busy weekend.  Friday we checked out a couple wedding venues and got ready for the party on Saturday afternoon.   I think there were 36 of us (including kids) to celebrate their engagement!   

My grandbabies are THE cutest sweethearts you could imagine!  I had a blast spoiling them this weekend!   On Saturday morning, Izzy & my oldest daughter, Erinn, were playing, as I was walked past Izzy looks at me and says "Grandma Linda, I love you!"  Of course, she has Grandma Linda (that is still a little weird to me, but in a good way! lol) wrapped around her little finger! lol.  On Sunday morning there was a quiet little knock on our bedroom door, when I said "who is it?" Brandon answered "me, can I please come in?"  How is one resist the sweet little guy, so he got to come in and snuggle with Grandma! (He might have Grandma Linda wrapped around his little finger too! lol) I could go on and on about Brandon & Izzy, but I will spare you, at least for now! lol 

Pictured is Brandon, Randy, Kristine & Izzy!

A couple of weeks ago, when the CC challenge was inking grunge I created this ATC with the Gingersnap Creation Color challenge - Yellow, Orange & Red (GC #64)  in mind.  I did not even think about challenge #63 - Sunshine until I looked at the ATC this evening and compared it to my list of challenges!

Here's my 1-fer-2 ATC! It's made on grungeboard with Distress Ink, an Idea-ology corner, some miscellaneous beads and I believe the sun is from a package of Colorbok chipboard dies with added ink on the rays!


Hope your weekend was FABULOUS!

Take care!

Linda

Friday, August 13, 2010

CCC #9 (edited to add Gingersnap Creations Challenge 66: Paint!)

As you know for the past 9 weeks, every Monday Linda at Studio L3 posts a new Compendium of Curiosity challenge.  This Monday was no different and since I KNEW I had a busy week I planned on completing the challenge on Monday night.  It didn't happen.  I did  FINALLY finish the project, just a little later than I wanted.

Week 9's challenge can be found on page 42, Distress Crackle.  This week instead of an ATC, I went in a different direction!

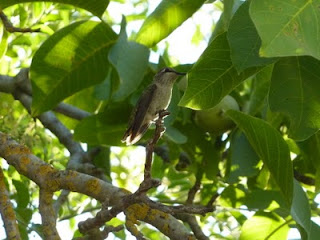
I tried taking pictures in the studio of the completed project, but they were not very good.  This morning I took my "masterpiece" and headed outside for some natural lighting.  I was just about finished with the photos when I heard a noise that sounded very close to my ears.  I looked up and saw a shadow of a hummingbird on the house.  When I (slowly) turned around she was only a couple feet away.  I tried to get a picture of her, but she was too fast.  After a short time, she flew to a branch and sat.  I tried getting a picture of her sitting there watching me.  Even with a 10x zoom she blended in with the trees too much.  Then she took off again to come "distract" me, but only now she had help! There were 2 hummingbirds flying around me.  I managed to get my camera on burst shooting, but still didn't get a good picture (didn't think about changing to action shots until I was typing this!)  She went back to original branch and sat and watched.  Then he decided to sit on a branch that was much lower and I was able to get a picture!
I looked around, but didn't see a nest, but I am sure there must have been one nearby because normally hummingbirds do not usually get as close as these two were to me!  Thankfully, they didn't get any closer or I might have nightmares (a la Alfred Hitchcock's  "The Birds") lol

Oh, I did manage to get a picture of my project too!

The wood frame is from Ikea that I painted with acrylic paint, after that dried I followed page 42 using  Broken China and Peeled Paint Distress Crackles.   On the ship's wheel I used Weathered Wood Distress Crackle.  The seaweed is again leftover scraps from Charlene's journal and the sand is from MuddPuddles.  The Mermaid image is a Microsoft Office Clipart, it's hard to tell in the photo but I used Sakura Glaze pens on her hair, clam shells and scales.  On her necklace I used Stickles.  She is cut out and mounted on foam tape. 

Have a fabulous weekend!  I know I will - my youngest daughter is coming home with her fiance and my future darling grandkids and we will be celebrating their engagement with family and friends!

Take care
Linda

PS As I wait INPATIENTLY for my daughter to arrived I was checking out blogs and realized my frame will work for the Gingersnap Creations Challenge 66: Paint since Distress Crackle is a type of paint!  I LOVE it when one project  works for multiple  challenges!

Wednesday, August 11, 2010

Inspiration from Paula's "disappearing" post

I think it was a week or two ago that Paula posted an ATC she had created.  I really liked her "Under the Sea" ATC.  In fact, I liked it so much I was inspired to create an ATC of my own!  

Today I saw she had an update so I went to check it out her art work.  There was no art work, just a message saying the "Under the Sea" post had disappeared.  Oh NO!!  Actually it isn't bad at all, she had to remove the post because she received word it is being published in Scrapbook News and Review!!!  Congratulations Paula, I am SUPER excited and proud of you!  Way to go!

Here is my version of "Under the Sea" (other than both are "ocean" ATCs, mine and Paula's look nothing alike!)

The background on mine is made from paper towels I had used to wipe up excess Distress Ink after "smooshing"!  I used Claudine Hellmuth's multi-medium to adhere the paper towel to the ATC backing.  The sand is some "Cabana" MuddPuddles I won at Scrapbook Update a couple of months ago.  The seaweed was made out of some leftover  paper (glossy cardstock with alcohol ink) from Charlene's book. I used  Distress Ink (not sure which green) on the seaweed stamp and then cut it out.  The fish is a rubon (don't remember the brand and she was the last one so I threw the package out)  The shells and "inspire" are more things from my stash.

One of these days, I am going to have to suck it up,  be brave and submit projects for publications. 

Take care,

Linda

Sunday, August 8, 2010

Week 8 of the Compendium of Curosity Challenge!

Just a quick post for Week 8, last Monday (August 2) Linda at Studio L3 instructed us to go to page 39 for this week's lesson: "Inking Grunge".    Here's an ATC I created for the challenge:


Check Studio L3 blog Monday morning  for the newest challenge and check it any time for AWESOME and INSPIRING projects!!

Have a fabulous week!

Linda

Monday, August 2, 2010

Trip Planner

If you read the comments on this post, Charlene was right.  She knows the secret and it's all hers! 

It all started with a simple plan based on some light harassment.   The "light harassment" came from me, not that I make it a habit to harass or tease you understand.  It was just an odd moment for me, really.  The recipient was Charlene!

Charlene & I were talking about the cruise and things that we needed to do, plan, prepare, etc.  She said something about making lists and having everything planned out so she knows what she is doing and when she is supposed to do it. As she says, she is not the spontaneous sort. Me on the other hand, I can go either way, plan it or wing it. . . once the  vacation is planned and I know the general plan, I usually switch to wing it mode.  One thing lead to another (this was over a couple of weeks) and I told her to hold off on a planner.  This was probably sometime in June.

Luckily for me, Charlene had a trip to ComicCon a couple of weeks ago, so that was distracting her (at least I hope it was) from the fact I hadn't come through with the planner.  Since she got back, I reminder her not to get a planner.  I have worked on it steadily, but it just kept growing, and Growing and GROWING!!!   Even as I was putting finishing touches on it Sunday, I thought of and added 2 more elements!

I am happy to say on Sunday, August 1, she finally got her planner!  The original idea was to buy a binder, alter it a bit and hand it over.  That lasted as long as it took me to go to a couple of stores, looked at what was available, and decide that I  could use my bind-it-all and make something much better.  Simple, but better.

I started with a composition book and tore it apart - literally.  I wanted the covers for the journal.  I covered the front with grungepaper AFTER I applied the CCC Week 4 technique to it.  I also ran the (horizontal) center through my  Sizzix "Burlap" Texture Fade, added the label, dusted off my Fastenator, applied some alcohol ink to the fastener and came up with this. 


Not all the tabs are visible, but there are 16, one for each day we are gone plus one to get "ready", "set", and "go".  Don't worry, I am not showing  you everything, just my favorites. . . I will leave some for Charlene to show on her blog too!   Like I said, the planner kept growing, and there are not bind-it-all wires that are big enough, so then the plan was to use Tim's "D-rings".  Guess what? They weren't big enough either.  I ended up using  "giant" (3" binder) rings!

In addition to each tab, I included a pocket on the back of each tab, at least 4 pages for notes and journaling, confirmations we have already received (i.e., ship's itinerary) and a page for photos.  One other feature, since this is a rather "lumpy" book and writing in would be difficult, I made a portable "writing table" that can be slipped under the page she is writing on!

Even though it took me forever to complete, it was a fun project!  I used lots of techniques, some tried and true like "smooshing" (distress ink & water or alcohol inks on the craft mat then smoosh the paper into it)  and some new techniques like the page above with the ship.  For that page I lightly painted the paper in a couple of colors, wiped it off,  then stamped, then added a couple of collage elements. 

The "real" reason I made it for Charlene is so she will have all the details and I won't have to remember anything except to have fun!


So now you know what the "secret" project that kept me MIA!  If I am mostly MIA for the next couple of weeks, I will be getting ready for my youngest daughter's engagement party!   Hope you have a fabulous week.

Linda

PS - Watch Charlene's blog for more of the journal, but she may wait until we are back from the cruise as she said she'd show it a page at a time after she filled it up.

Sunday, August 1, 2010

CCC #7

Just a quick post for CCC # 7, for the details go to the Studio L3 Blog and while you are there, check out the other AWESOME projects for this week's challenge and Linda's inspiring art!!!

This weeks challenge Tinted Vision Fragments was found on page 55 in the Compendium of Curiosities.  Charlene came over earlier in the week and we each worked on the fragments.  I used a picture of my parents when they were dating and a 1 1/2" fragment.  

Later in the week I started working on something to use the fragment on and came up with a 4 x 5 canvas frame.   I used all kinds of layers on the frame, then decided the fragment was too small.  Using a larger version of the same image, I ended up with one just right!  Well at least I think it was just right!


In the next few days, I will post some pictures of a project I just completed.  It started out as a relatively simple project, but it just kept growing and growing and growing!  (If you are wondering why I haven't been around much lately, it's because of trying to get the project completed!)

Have a fabulous week!

Linda