
Tuesday evening I was a bit stressed, so I did something that "de-stresses" me. I "Smooshed"! Smooshed? What is "Smooshing" you ask? Perhaps you know it better by what Tim (Holtz) calls it, "Wrinkle Free Distress"! You can find the directions for Smooshing, I mean, Wrinkle Free Distress on page 33 of Tim's book A Compendium of Curiosities.
I used every color of DI (not all on one sheet) and created 10 sheets of background paper! I had great fun and felt much better after I finished!
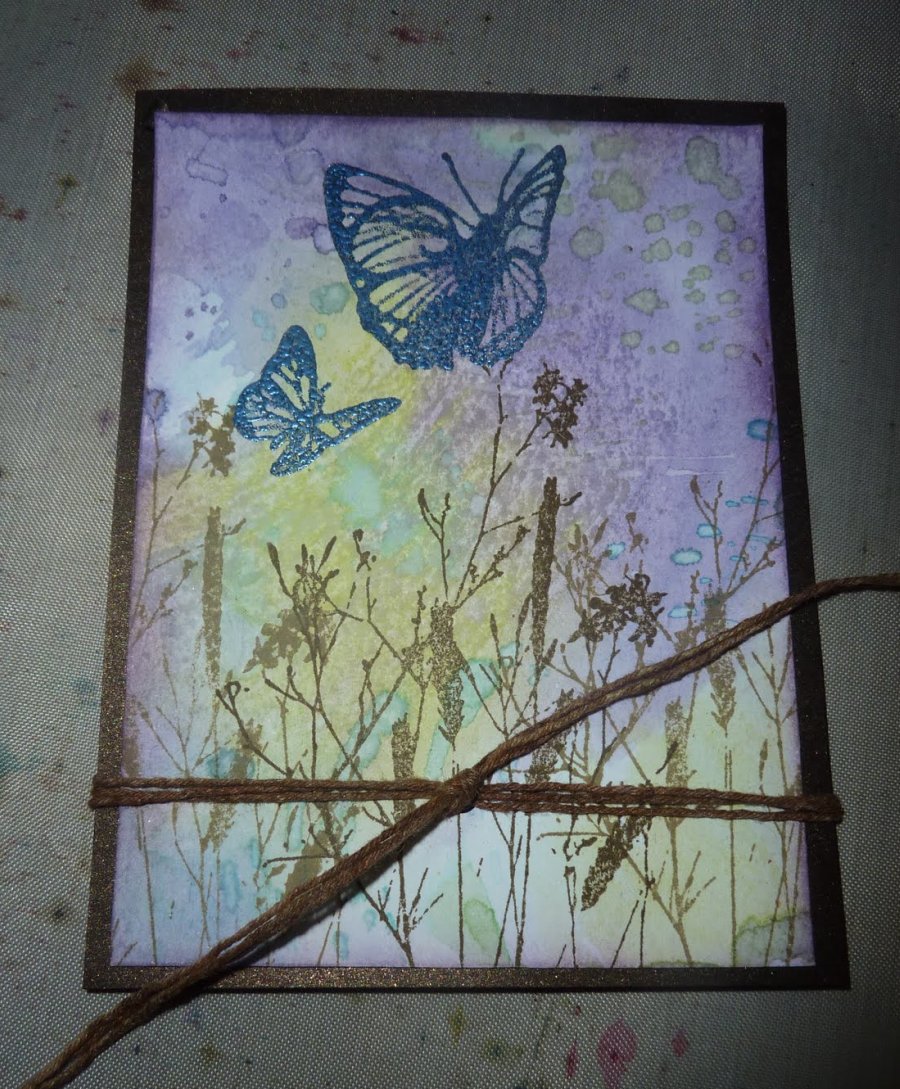
I used part of one of the background pieces for this card:

A while back I took a class at Stamper's Corner (Elk Grove, CA) where Nellie taught us a nifty trick for bows/knots on our cards. What is nifty is the bow/knot will stay exactly where you put it! With her permission, here is how to make a Nellie Knot.
1) Decide where you want your bow or knot.
2) Punch a hole in the chosen spot. (Note: If the card is vertical like mine, then just put a hole in the top layers before you adhere it to the card. If the card is horizontal, then you can adhere the layers, then punch the hole the layers and card.)

3) Cut a piece of fiber 2 1/2 to 3 times as long as the width of the direction the fiber will go.
4) Fold fiber in half.
5) Push fiber from front to back through hole.

6) Put ends on either side of hole and loop the fiber from the back over to the front (making sure there are no unwanted twists in the fiber).


7) Tie the bow or knot!
8) Voila! A bow or not that won't move or fall off! Pretty nifty, huh?

Hope you enjoyed the tutorial!
Be sure to check out Linda's (Ledbetter) blog on Monday morning for Grungy Monday 11!
Have a fabulous week!
Linda
Products used to create: Craft sheet, White Diamond paper (from Stampers' Corner), Distress ink (Broken China, Tumbled Glass, Dusty Concord, Peeled Paint, Frayed Burlap, Walnut Stain, Vintage Photo), Art Glitter Mist (copper), Ace Hardware multi-purpose twine, Idea-ology Muse Token, Tim Holtz "Odds & Ends" and "Nature's Discovery" stamps, Ranger Ink Pearl Blue embossing powder.
I have become a fan of Distress Ink. I love the stuff you make with it. I stop on to see new creations,and I got a free lesson!!!! You have been very busy! Good job!!!!
ReplyDeleteI like the Smooshing! I too was at a loss as to what to do with DIs - soooo many ideas but sometimes the simple ones can be effective! Thanks for the tut on the bow - I will try it next time!
ReplyDeleteAwesome card and great tutorial! Love it!
ReplyDeleteBeautiful card! TFS the Nellie knot technique--very handy! Paula
ReplyDeleteDear friend, I agree-- smooching is one of the BEST de-stressing activities in the world! You've made some magic again with this beautiful card-- Distress Ink perfection, in fact. Love those stamp images, too.
ReplyDeleteThank you for the awesome tutorial on adding bows/knots-- this is GREAT info that I will use until the end of time.
You rock, girl!
This is beautiful Linda, I love that knot technique! Thanks for sharing!
ReplyDeleteAlison x