Showing posts with label Eileen. Show all posts

Saturday, October 16, 2010

October 1

October 1, 2010 was a day of "firsts" - There's the obvious, the first day of October.  One of the first things I do every morning  when I am cruising is to get a picture of an elevator floor. It really is a useful picture, because after a day or two on the ship I tend to forget what day we were in! lol It also lets me easily (at least before I upload photos) tell when a new day starts in photos because the days all start to run together.


It was also our first full day on the ship, first day at sea and FIRST class with Tim on our adventure!!  There were 2 classes with approximately 80 crafters in each class.  Charlene and I,  as well as many other friends, were in the first group!  

The first class started at 9 a.m. but the store opened at 8 a.m.!  I had great plans to be there before class.  It didn't work out so well.  I walked in the store about 10 minutes before class, but there was a huge line, so I just went to the classroom instead.  It was probably a good thing, at least for my checkbook!  I did make it back after class and got a few things that only put a medium sized dent in the ol' checkbook! 


If you are wondering how Tim is able to have so many in a class, he uses PowerPoint, we had 2 screens  and a microphone.  He also had Michelle, Karen and Joy helping out!  We each had a kit in our work station with most of the supplies we needed as well as complete written instructions!

As I mentioned, most of the supplies are in are kits, but there are some things they save to hand out during class, such as the paper you can see spread out in the upper right as Charlene is working on her cover.


Apparently I was either still sleeping or Tropical Storm Nicole bothered me more than I realized as I only took 3 (yes, three) photos before/during class and one of those were deleted.    I didn't even take a picture of Tim's journal as it made its rounds.  If you would like to see his, he has it posted on his blog here!

Here's my journal, at least the part that you get to see right now. . .I still have a lot of work to do on it before I am ready to show off the inside.   I did not work on my after class, I was too busy doing other things! lol. 


October 1 was also our first formal night! 


Linda and Charlene

Edith and Barbara

That was it at our table, just 4 of us.  Barbara is a fellow crafter and Edith is her non-crafty friend.  We had a delicious dinner (not sure what we had because once again I failed to take photos but all the meals were fabulous so I know this one was too!)  When dessert arrived someone said something that had me remembering to grab the camera and take pictures. 


I have no idea which one was mine and which one was Charlene's but I know they were both yummy!  After dinner, Charlene & I went back to our cabin, changed clothes and made our way to the theater for the first production show - Invitation to Dance!


While we were waiting for the doors to open, we ran into Lori, Maurene, and Wendy, so enjoyed their company while enjoying a drink and the show!


Wendy, Maurene, Lori, Linda & Charlene
After the show, we headed back to the cabin and to bed as the next day was our first port! 

If you want to read other versions of our cruise, here is a partial listing of cruise blogs. . .

Tim - includes a video and all the projects in one stop!
Lori - She's a couple days ahead of me on posting
Eileen - She's also a couple days ahead

. . . if you have a blog you are recapping the cruise on and I don't mention you here please add a link in your comments and/or send me a note and I will add you to the list.

Thanks for dropping by and sharing my adventures!

Wednesday, July 7, 2010

Compendium of Curiosities Challenge 4

It's hard to believe this is the 4th week already, it seems like we just started Challenge 1 a few days ago!  Are you playing along? I hope so because it is fun and educational!  Go to Studio L3 for details!  If you play, you might even win a prize in  a random drawing!

This week's challenge is "Shabby Chic" and can be found on page 49 of  Tim's Compendium of Curiosities book.

I struggled with this one but learned a few things along the way.  I ended up making 6 pieces - 5 ATCs and one slightly smaller (than an ATC) piece.  Don't worry I am not going to bore you with all the pieces, just the finished ones! lol


The Shabby Chic part of these ATC were both created, oops, found myself wanting to type directions here.  Turn to page 49 to find the directions, I followed them pretty closely.  I will tell you for the top coat I used my silver dabber and my gold dabber.

When we started this challenge 4 weeks ago Eileen  at ArtSavesLives blog mentioned she was going to keep an art journal of all the techniques as she does them.  I thought it was a fabulous idea and decided to create my own even though I am not much of a "journaler".    Then the only problem was what to use as my journal.  I sat in my studio pondering the question of what to use when my eyes landed on this:

This is a journal I created last year when Tim was in town and taught a "Nostalgic Metal Memoirs" class.  It was a fabulous class and I loved making this book. I loved working with the metal.   It has a hand-stictched binding which is something I had never attempted before and I enjoyed it.   When I showed it off to family and friends, they all wanted to know what I was going to do with it.  I told them I had no idea, but one day it's use would become clear.  And sure enough after sitting on a shelf for a year, its purpose became clear!  It's my art journal!  After 4 weeks I can even say I have faithfully added a sample of the technique along with a sentence or two about the technique!

Here's this week's sample:


For the sample I used Stream and Copper.

Oh, the few things I learned

1) Be PATIENT

2) Make sure your embossing ink pad is juicy

3) I know there was something else, but I can't think of it now. 

Go have some fun and play a little!

Take care
Linda

Wednesday, June 2, 2010

Roasted fish?

or bunny or lamb or flower or  . . . whatever you want!

I was checking out blogs earlier and stopped by one of my favorite stops, Eileen's ArtSavesLives blog  (not my cousin mentioned in the previous post but someone I met on the Voyage to Mexico cruise with Tim Holtz).  She always has awesome projects and links not to mention a great sense of humor.   I had to do a double take when I saw her fabulous 4 x 4 canvas! (scroll down on Eileen's blog to see the canvas) I saw something that looked really familiar. . . the fish!  It is one I created sometime last year for a swap on the All Things Tim yahoo group!!!    

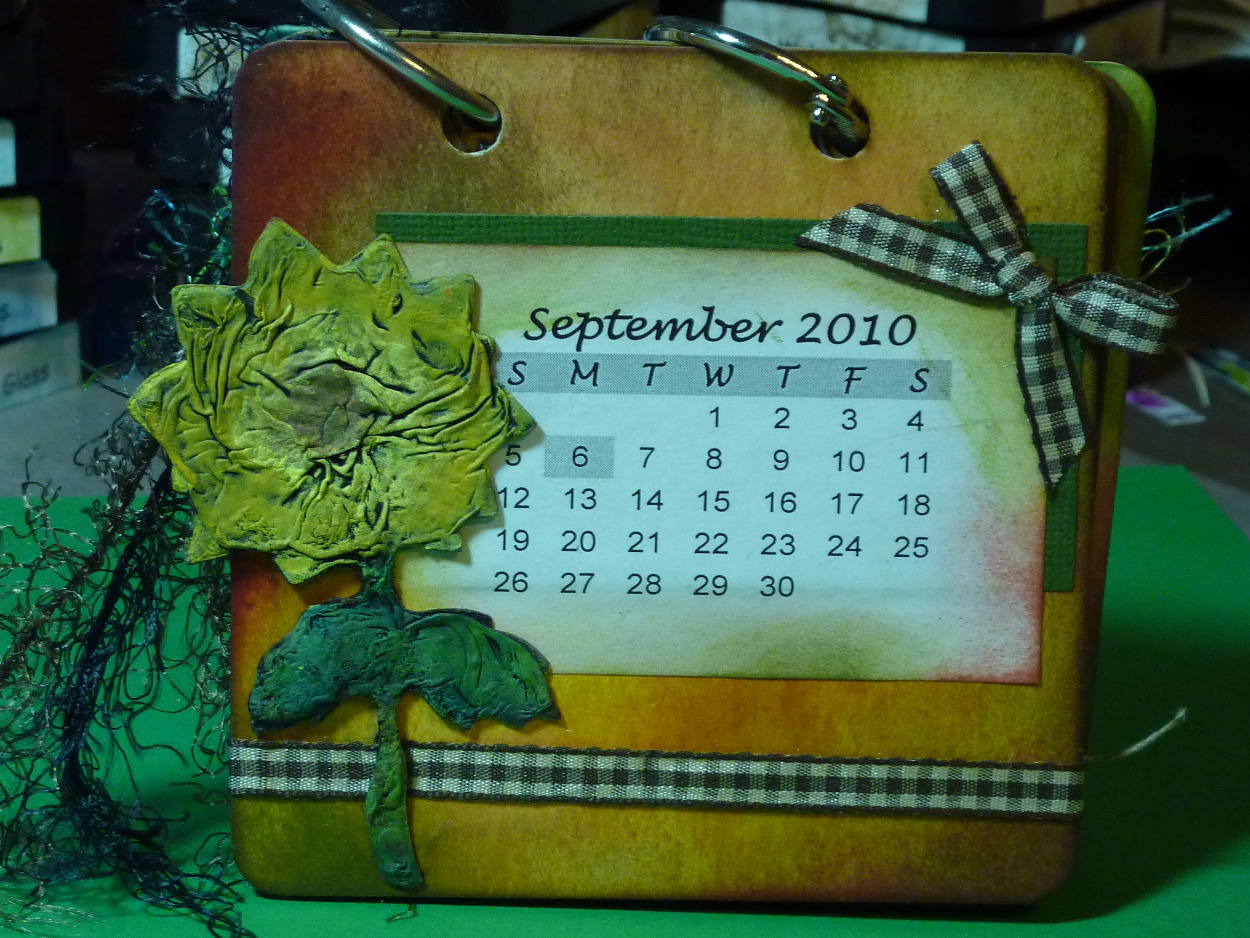
I used one of my fishies on my August calendar page

I told Eileen I would give the instructions on how to make that little guy (or anything else you want)!   First the disclaimer, if you try this at home (or any other place), do so at your own risk.

Now for the fun stuff!

The supplies you need are:
 * cut-out - can be any shape or size, can be free-hand or diecut.  As far as size I did not have much success with really small stuff (under an inch or so) or really big stuff (over 3-4 inches). I have used grungepaper, heavy brown grocery bags and cardstock.  I like grungepaper the best.  It is sturdier than the other papers I've used and it shrinks when it gets hot which I think adds to the overall look. 
 *Aleene's Tacky Glue - gold bottle (this is the only glue I have tried, so I don't know if anything else would work)
 * matches
 *container of water (just in case, I use a small glass bowl so not only do I have it "just in case" but I can put the used  matches in it and not worry)
 *candle - short pillar worked best for me
 * needle-nose pliers or other "holding device" you don't mind getting sooty (fingers will definitely not work for this one, lol)
 *cloth rags
 * sponges (I used $tree make-up sponges cut in half)
 * Acrylic paint - colors depend on what you are making

Step 1 - Light the candle
Step 2 - Spread the glue over the entire surface, there needs to be enough glue so you can't see the paper underneath it.
Step 3 - While glue is wet, pick up shape with pliers and hold glue surface as close to the flame as you can  (the non-glue side should be facing the ceiling)  moving slowly around until entirely burnt - about 2 minutes - give or take. 
Step 4 - Using a soft cloth rag, gently wipe off soot.  If it is done, it will be kind of a  metallic black under the soot.  If it is too "rare", it will look brownish.  If rare, return to flame for  another 20-30 seconds and re-test for doneness.
Step 5 - Once all the soot is wiped off, you can apply a little more pressure and squish the glue around (the outside is burnt, the inside is still wet) to give the object more texture.
Step 6 - This is the hardest part of all - once you have given it texture walk away from it and let it dry completely (I usually let the stuff sit for a day or two)
Step 7 - Use sponges to add color in layers.

Here are some more calendar pages and other critters I made -  


Some other notes - 

- The sunflower is the biggest object I made and was difficult to get all parts burned because of the uneven weight of the glue and trying to hold it with needlenose pliers.  Depending on the intended purpose, there is an alternative way of making the objects, especially big ones - before Step 1 you can glue a heavy piece of wire (18-22 gauge) or two between two cutouts, then proceed with Step 1.  After you completed the first side, you could glue/burn the second side and then have a totally dimenisional piece of art that can be used as a "sculpture".

- If you use to little glue and/or apply too much pressure you get a flatter surface as in my Jack-o-lantern above.

- In my examples the fish and Jack-o-lantern were made using grungepaper; the bunny, lamb, leaves and sunflower were all made with cardstock. 


If you have questions you can either leave a comment or send me an e-mail (link is in the side-bar).   


Edit:  6/3/10 9:55 p.m.

Just to clarify - "Roasted fish" is not my original idea (however, the title is my original idea! lol)- I discovered the technique in a  booklet I found at a thirft store called "Creative Living Book #99-207 - Aleene's Burnt Brown Grocery Bag" copyrighted 1991.

Friday, April 23, 2010

More challenges completed!!

I completed more 4 challenges!  I don't get much time in my studio as it has been converted to a bedroom for the moment too, so I made ATCs!  My daughter who is staying in my studio will be leaving in 10 short days to head to Sheppard Air Force Base in Texas for 4 months of training.  She just completed 4 years in the Air Force and is now in the Reserves.

I started by combining several GingerSnaps Creations challenges.  I combined GCSP3  Blue Moon Challenge - Take on a Tutorial with a little GC50 -.Found Objects and a little GC 51 Botanicals. 

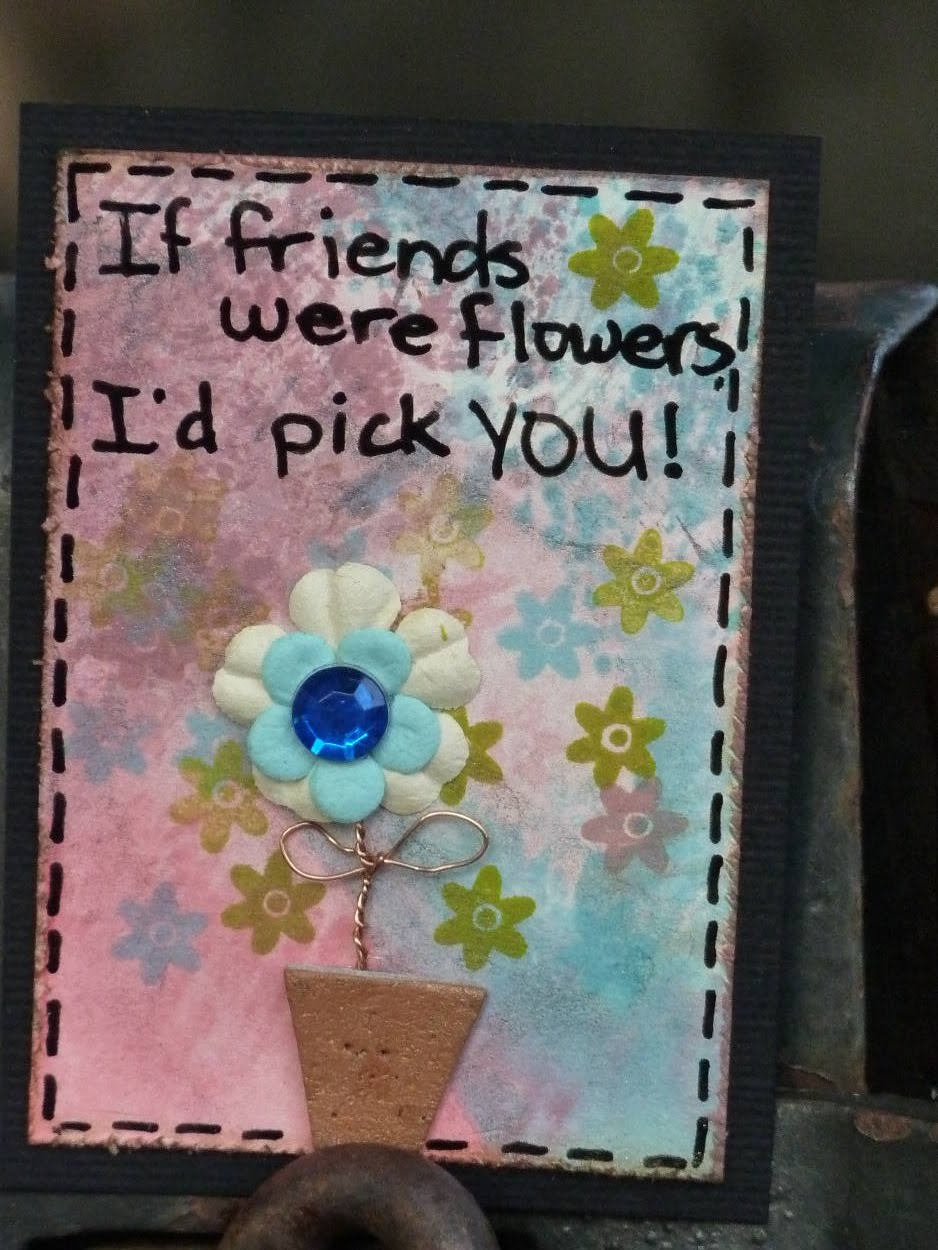
I used the ATC Tutorial by Susan Briss and made these 2 ATCs.   The way this really started was I started cleaning my work table.  I found everything with the exception of the woman on my worktable and the words.  The black backing was scraps as was the background paper I had created for another  project.  The pick-up was leftover from something, who knows what.  The flowers, gem stone and copper wire "stem" were in the pile of things to put away.  The "best" found object is the flower pot!  It was a left over piece from the Eiffel Tower in the card in the previous post!  I had used it to test colors.  The flower is "Botanicals", but I usually think "old fashion" when I think of botanicals so I may try to create something a little more old fashion for GC51.


 I completed Tuesday Taggers Dragons, Dragons Everywhere challenge.  I read Eileen's blog where she has mentioned the "Drunken Scotch" technique and gave a brief description on how to do it.  I read it in the morning.  I created the ATC in the evening without re-reading the description until AFTER I tried it.  Then I googled for complete directions.  The heat gun didn't make it to the glue until the glue had started to dry, and I didn't use Scotch brand glue, I used "Aleene's" Tacky Glue and various Alcohol Inks  (does that  mean I used the "Drunken Aleene Technique"? lol)  I used the technique as the frame. The background paper is courtesy of Astrid, she some free backgrounds on her blog!  The "ready to roll" came out of a magazine, I just added a little ink to age it a bit.  It's hard to tell in this photo, but the dragon is mounted on foam tape in the attempted to make it look like he is coming out of the frame.


And last but not least for today, I created an ATC for Art Creations Friday's challenge 71!  The image of the little girl  is on their blog, the background is another one from Astrid.  To me the little girl has such hope that she gets to go play in the water and sand down by the ocean!  The sand by her feet is a blend of Distress Stickles.

I am in the process of making my first ever easel card, maybe I will have something to show you later this weekend!   Hope you all have a great weekend!  Take care,

Linda